
Home Improvement
The Art of Interior Painting: Techniques for a Flawless Finish
Interior painting is one of the most effective ways to transform your living space, bringing new life and personality to your home. While it may seem straightforward, achieving a flawless finish requires a blend of skill, patience, and knowledge. This comprehensive guide will explore various interior painting techniques and tips to help you achieve a professional look, whether you’re a seasoned DIY enthusiast or a novice painter.
Preparing Your Space
Preparation is key to a successful painting project. It ensures a smooth application and a long-lasting finish.
1. Clean and Repair Surfaces
Before you start painting, it’s crucial to clean the walls to remove dust, dirt, and grease. Use a mild detergent solution and a sponge to wipe down the surfaces. Allow them to dry completely. Inspect the walls for any cracks, holes, or imperfections and repair them using a suitable filler. Sand the patched areas to ensure a smooth surface.
2. Protect Your Space
Cover the floors and furniture with drop cloths or plastic sheeting to protect them from paint splatters. Use painter’s tape to mask off edges, trim, and any fixtures that you don’t want to paint. This will help you achieve clean, sharp lines.
3. Priming the Walls
Priming is an essential step that shouldn’t be skipped, especially if you’re painting over a dark color or a new, unpainted surface. Primer helps the paint adhere better to the walls and enhances the paint’s durability and coverage. Choose a high-quality primer that suits your wall type and apply it evenly.
Choosing the Right Paint and Tools
The choice of paint and tools can significantly impact the outcome of your painting project.
1. Types of Paint Finishes Paint finishes range from flat to high gloss, each offering different aesthetics and durability:
- Flat/Matte: Ideal for low-traffic areas and ceilings, as it hides imperfections well but is less durable.
- Eggshell: Offers a slight sheen and is more durable than flat finishes, suitable for living rooms and bedrooms.
- Satin: Provides a smooth, velvety finish and is easy to clean, making it perfect for high-traffic areas like kitchens and bathrooms.
- Semi-Gloss: Durable and moisture-resistant, ideal for trim, doors, and windows.
- High Gloss: Extremely durable and reflective, best for surfaces that need frequent cleaning.
2. Sustainable Paint Options For those looking to reduce their environmental impact, long-lasting, sustainable paints are an excellent choice. These paints are low in volatile organic compounds (VOCs), which makes them healthier for your indoor air quality and the environment. Brands like Benjamin Moore and Sherwin-Williams offer eco-friendly options without compromising on quality and durability.
3. Essential Tools Investing in the right tools can make your painting job easier and more efficient:
- Brushes: High-quality brushes are essential for cutting in and painting trim.
- Rollers: Choose a roller with the appropriate nap length for your wall texture. A shorter nap is suitable for smooth surfaces, while a longer nap works well on textured walls.
- Paint Trays and Liners: These help you load your roller evenly with paint and make cleanup easier.
- Extension Poles: Useful for reaching high walls and ceilings without a ladder.
Painting Techniques for a Professional Finish
Mastering the right painting techniques can make a significant difference in the final appearance of your walls.
1. Cutting In Cutting in refers to painting the edges and corners of the walls where a roller can’t reach. Use a high-quality angled brush for this task. Dip the brush into the paint and remove excess by tapping it on the side of the can. Start a few inches away from the edge and work your way towards it, maintaining a steady hand for clean lines.
2. Rolling the Walls Once you’ve cut in, it’s time to roll the walls. Pour the paint into a tray and load your roller evenly. Use the “W” technique to apply the paint in sections, creating a large “W” on the wall and then filling it in without lifting the roller. This ensures even coverage and minimizes lap marks. Work in small sections and maintain a wet edge to avoid visible lines.
3. Applying Multiple Coats For a rich, uniform color, it’s often necessary to apply multiple coats of paint. Allow the first coat to dry completely before applying the second. Lightly sand the surface between coats to remove any imperfections and ensure a smooth finish.
4. Finishing Touches Once the final coat is dry, carefully remove the painter’s tape while the paint is still slightly wet to avoid peeling. Inspect the walls for any missed spots or uneven areas and touch them up as needed.
Enhancing Your Painting Project with Tailored Color Consultations
Choosing the right colors for your home can be overwhelming, given the vast array of options available. Tailored color consultations can help you make informed decisions that suit your style and preferences.
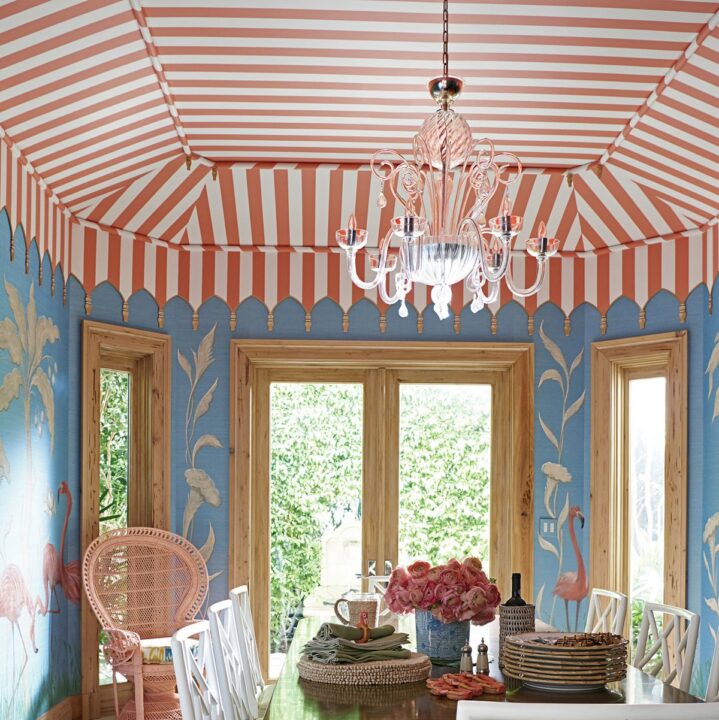
1. Understanding Color Psychology Color psychology plays a crucial role in creating the desired ambiance in your home. Different colors evoke different emotions and can influence your mood:
- Blues and Greens: Calm and relaxing, ideal for bedrooms and bathrooms.
- Reds and Oranges: Energizing and stimulating, suitable for dining rooms and living areas.
- Neutrals: Versatile and timeless, perfect for any room.
2. Considering Lighting and Space The amount of natural and artificial light in a room can affect how colors appear. Lighter colors can make a small space feel larger and more open, while darker shades can add coziness to a large room. Tailored color consultations take into account the lighting conditions and spatial dynamics of your home to recommend the best color choices.
3. Staying On-Trend Keeping up with current color trends can add a modern touch to your home. Popular trends include earthy tones, muted pastels, and bold accent colors. A color consultant can guide you on incorporating these trends in a way that complements your existing décor.
4. Personalizing Your Palette Your home should reflect your personal style and taste. Tailored color consultations help you create a customized color palette that resonates with you and enhances the overall aesthetic of your space. Whether you prefer a minimalist look or a vibrant, eclectic style, a color consultant can provide expert advice.
Conclusion: Achieving a Flawless Interior Painting Finish
Interior painting Lynchburg is an art that requires careful preparation, the right tools, and expert techniques to achieve a flawless finish. By understanding the importance of surface preparation, choosing the appropriate paint and tools, and mastering essential painting techniques, you can transform your home into a beautifully painted sanctuary.
Moreover, utilizing sustainable paint options not only benefits your health and the environment but also ensures a long-lasting, high-quality finish. Tailored color consultations can further enhance your painting project by helping you choose the perfect colors that reflect your style and suit your home’s unique characteristics.
Whether you’re undertaking a DIY project or hiring professionals, these insights and tips will guide you towards a successful and satisfying interior painting experience. Embrace the art of painting and enjoy the transformative power it brings to your living space.

Embarking on a home renovation project can be an exhilarating yet daunting process, with many homeowners overlooking the inevitable accumulation of debris and unwanted materials. Efficient junk removal is a crucial component of a successful renovation, ensuring your work area is safe and clutter-free. Whether tearing down walls or updating fixtures, the waste generated can quickly become overwhelming. Professional junk removal companies provide the necessary means to keep your renovation organized and on track. Below, we explore the benefits of enlisting expert services for your home cleanout tasks.
Ensuring Safety and Compliance with Professional Junk Removal
Renovation projects can create hazardous environments if waste is not managed properly. Sharp debris, heavy materials, and potentially dangerous substances all pose serious safety risks. Hiring professionals for junk removal ensures these threats are handled correctly, reducing the chance of accidents or injuries.
Beyond safety, proper disposal is essential to stay compliant with local laws. Companies offering junk removal in Fort Collins, CO, are familiar with state and municipal regulations, use the right equipment and techniques to remove waste responsibly. Their services reflect a strong commitment to both safety and environmental care.
The Importance of Efficient Debris and Junk Removal During Home Renovations
Home renovations often produce large amounts of waste, including construction debris, old appliances, and personal items. If not properly managed, this clutter can hinder workflow, delay progress, and create safety hazards for contractors. Maintaining a clean and organized site is key to keeping renovations efficient and on schedule.
Professional junk removal services play a vital role by regularly clearing debris, allowing work to continue without interruption. These services also sort materials for recycling or donation, minimizing environmental impact. For homeowners, handling debris alone can be overwhelming and time-consuming, making professional help a practical choice that eases the burden and supports a smoother renovation process.
Streamlining Your Renovation Project with Professional Junk Hauling Services
Integrating professional junk hauling services into a renovation plan helps streamline operations by allowing construction teams to concentrate on building tasks without the distraction of waste removal. These services bring the necessary equipment and expertise to handle heavy or awkward debris efficiently, reducing strain on renovation crews.
A structured disposal approach also aids in cost control, as many companies provide upfront pricing based on volume or material type, helping homeowners avoid unexpected expenses. Junk removal teams ensure safe, efficient handling of discarded materials, maintaining workflow and project timelines. Their involvement supports a cleaner, safer site and allows homeowners to focus on design choices rather than logistics.
Enhancing Your Home’s Aesthetics and Value through Expert Cleanout Solutions
A clean, well-maintained renovation site significantly enhances both the visual appeal and efficiency of a project. Clutter and debris not only disrupt progress but also diminish the workspace’s appearance. Professional junk removal services help maintain order by promptly clearing waste, highlighting the renovation’s progress.
The property’s exterior also benefits, as a tidy environment boosts curb appeal and suggests careful project management, positively influencing perceived value. Removing old or unused items creates more functional space, making it easier to plan and implement design changes. This organized approach also supports long-term upkeep by encouraging homeowners to maintain a clean and well-managed space beyond the renovation phase.
Choosing the Right Junk Removal Company for Your Renovation Needs
Choosing the right junk removal service during a renovation requires careful consideration. Research a company’s experience, customer feedback, and whether they specialize in construction debris, as this can lead to better service tailored to renovation needs. Look for providers with clear pricing and free on-site estimates to avoid unexpected charges.
Evaluate their environmental practices; companies that focus on recycling and donation over dumping contribute positively to sustainability. It’s also important to assess their availability and flexibility, since renovation schedules often change. A provider that can adapt and offer prompt service helps keep the project on track without unnecessary delays.
Altogether, hiring a professional junk removal service for your home renovation project delivers numerous advantages, ranging from enhanced safety and efficiency to compliance and aesthetics. By selecting the right service provider, homeowners can streamline their renovation process and achieve a clutter-free, valuable outcome for their property.
READ ALSO: Save Time and Stress: The Advantage of Professional Junk Removal

Embarking on a home renovation can be an exhilarating endeavor that breathes new life into your living space. Amidst the excitement and planning, the accumulation of debris and old materials can become an overwhelming byproduct. Fortunately, professional junk removal services play a crucial role in maintaining the cleanliness and organization necessary for a successful renovation. They efficiently strip away the clutter, enabling homeowners to focus on the transformative process. Below, we’ll explore how these services can be integral to your next home improvement project.
Maximizing Space and Minimizing Stress: The Benefits of Professional Junk Hauling
Junk hauling services play a vital role in streamlining home renovations. By clearing out old fixtures, furniture, and debris, they free up valuable space needed for contractors and designers to work efficiently. This space optimization helps keep the renovation on track and allows the vision to take shape without clutter getting in the way.
Beyond just clearing space, professional junk removal in Austin, TX, can ease the emotional and financial strain on homeowners. Quick debris removal reduces stress, speeds up the renovation timeline, and often proves more cost-effective than DIY disposal. With less mess and more progress, homeowners can get back to enjoying their space sooner.
The Role of Junk Removal in Streamlining Home Renovation Projects
Junk removal services are essential during home renovations, helping to maintain a clean worksite and keep the project on schedule. They handle bulky items like old appliances and cabinetry, reducing physical strain on homeowners and renovation teams. These professionals also handle hazardous materials like asbestos or lead-laced paint, adhering to best practices to protect health and ensure regulatory compliance.
The prompt removal of debris by a professional team is reassuring for homeowners, as they can trust their property will be treated with respect and renovation will proceed without unnecessary hindrances caused by accumulated debris. Trusting these professionals ensures a smooth and efficient renovation process.
Enhancing Safety and Efficiency During Renovations Through Debris Removal
Junk removal services are crucial for safety and efficiency on renovation sites, as they help remove hazards like sharp objects, nails, and splintered materials. This reduces the risk of accidents and injuries. Cluttered spaces can impede workflow and extend project timelines, but junk removal experts ensure workers can move freely, allowing for timely completion.
They can handle large-scale waste removal, ensuring no delays in waste management. Professional debris removal also maintains the property’s aesthetic, as it helps maintain neighborhood standards and property values.
How Junk Removal Services Complement Contractor Work on Home Renovation Sites
Contractors can improve the efficiency of home renovations by partnering with junk removal services. Contractors, skilled in construction, electrical work, and plumbing, can’t specialize in waste management. Hiring a junk removal service allows them to focus on their craft without being distracted by cleanup duties.
This synergy leads to a seamless transition from demolition to reconstruction. Junk removal services also offer flexibility, allowing them to adapt to unexpected challenges and changes in waste disposal needs. This ensures that waste is handled responsibly and in compliance with regulations, providing liability protection and avoiding potential penalties or fines.
Transforming Renovation Waste Into Opportunity: Recycling and Donation Options
Sustainability is a growing concern in various industries, including home renovation. Junk removal services help homeowners and contractors make eco-friendly disposal decisions by recycling materials like wood, metal, and plastics. They also offer the option to donate usable materials to local charities or non-profit organizations, promoting a cycle of reuse and sustainability.
Junk removal services often partner with recycling centers and donation facilities, providing transparency and a sense of participation in a healthier planet. By considering environmental and charitable options, junk removal becomes a statement of values, allowing homeowners and contractors to feel pride in repurposing renovation waste in meaningful ways.
Altogether, junk removal services offer indispensable benefits to home renovation projects by promoting efficiency, safety, and eco-responsibility. They not only facilitate the logistical aspects of a renovation but also contribute to the ethical disposal and recycling of materials.
You May Also Like: Save Time and Stress: The Advantage of Professional Junk Removal

First impressions are everything when it comes to real estate. The exterior of your home is the first thing potential buyers see, and its condition can significantly influence their perception of the property’s value. A cluttered yard or an exterior that’s littered with unwanted items can detract from the beauty of a home and even decrease its market value. Fortunately, one effective way to enhance curb appeal is by employing professional junk removal services.
Understanding the Impact of Curb Appeal on Property Value
Curb appeal is not just about aesthetics; it’s an essential factor in establishing property value. A well-maintained exterior signals to potential buyers that a property is cared for, thereby increasing its attractiveness and perceived worth. It’s the first opportunity to showcase the home’s inherent qualities and the homeowner’s attention to detail.
Landscaping, the state of the façade, the condition of the driveway, and the presence of trash or debris all contribute to a property’s curb appeal. When these elements are in disarray, they can suggest neglect and potentially lead to lower appraisal values. A visually appealing exterior is crucial in real estate as it can lead to a higher number of showings and stronger offers from prospective buyers.
Junk Haulers Dallas understands the market dynamics and how removing excess clutter can alter a buyer’s first impression. They can efficiently clear out unnecessary items, ensuring that a property’s exterior presents its best self to potential investors and the community at large.
Enhancing Landscaping and Garden Spaces through Debris Removal
Landscaping plays a vital role in enhancing a home’s curb appeal. However, overgrown gardens, fallen limbs, and scattered yard waste can overshadow the most stunning landscape designs. By removing this debris, homeowners can reveal the true potential of their garden spaces, enabling plants and design features to become prominent.
Junk removal services can aid in turning cluttered and unkempt gardens into tranquil, inviting spaces. The removal of unwanted items provides room for new plants to thrive and can make ongoing garden maintenance significantly more manageable. Clearing away old garden furniture and broken planters also contributes to this transformation, creating a more appealing outdoor environment.
Many homeowners also utilize their gardens and yards for entertainment. A debris-free landscape can enhance the functionality of these areas, making them more conducive for gatherings and relaxation. Uninterrupted lawn spaces and clear garden paths add to the accessibility and enjoyment of outdoor living.
The Visual Benefits of Decluttering Driveways and Walkways
The condition of driveways and walkways significantly affects the overall look of a property. Accumulated items such as old cars, unused tools, and miscellaneous clutter not only restrict movement but also create a sense of disorder. Junk removal services provide a remedy, decluttering these areas to improve the visual flow and accessibility of the home’s exterior.
A decluttered driveway offers a welcoming approach to the home and can convey a sense of spaciousness. Ensuring these pathways are clear can also reduce the risk of accidents and improve the functionality of the space, allowing for smooth ingress and egress for vehicles and pedestrians alike.
Similarly, walkways and sidewalks are integral to the curb appeal of a home. When free from clutter, they guide visitors to the entrance of the home in a manner that is both attractive and safe. Junk removal services can assist with clearing out any obstructions, highlighting the intentional design of pathways, and contributing to the overall cohesion of the landscape.
Increasing Homebuyer Interest With a Junk-Free Property Presentation
A home’s presentation can make or break a buyer’s interest. As real estate markets become ever more competitive, the need to present a property in its best light becomes paramount. Clearing a property of junk can significantly influence a buyer’s opinion, making them more likely to consider purchasing.
When a property is clutter-free, it becomes easier for potential buyers to visualize themselves living there. Junk removal services enable sellers to present a blank canvas, thereby allowing individuals the chance to project their own ideas and preferences onto the space. This personal connection can be a critical element in closing a sale.
Overall, investing in junk removal services is an essential step towards enhancing the curb appeal of a property. It allows homeowners to present a clean and attractive exterior, boosting the potential value of their home and igniting the interest of potential buyers. Altogether, this simple service can yield immense benefits for homeowners looking to improve their property’s marketability.
-

 Education1 year ago
Mastering Excel: Your Comprehensive Guide To Spreadsheets And Data Analysis
-

 Tech1 year ago
How To Choose The Best Forex Trading Broker?
-

 Business2 years ago
Exploring the Rental Market: Properties for Rent in Malta
-

 Blog1 year ago
Arab MMA Fighters Shine Bright: Meet the Champions of PFL MENA
-

 Travel2 years ago
Experience the Best Desert Safari Dubai Offers!
-

 How-To Guides2 years ago
Comprehensive Guide to Cockwarming: Enhancing Intimacy and Connection
-

 Home Improvement2 years ago
Eco-Friendly Round Rug Options for Sustainable Living in NZ
-

 Fashion2 years ago
Black Magic: The Elegance and Sophistication of Ultimate Homecoming Dresses in Black