
How-To Guides
How to Convert MOV to MP4 with Conversion Tools

Are you struggling to ensure your videos play smoothly on all devices? Converting your media files from MOV to MP4 might be the solution you need. MP4 is a versatile format supported by most devices and platforms, making it essential for seamless playback and sharing. In this comprehensive guide, we’ll dive into the most efficient methods and tools to convert MOV to MP4, emphasizing easy-to-use solutions like HitPaw Video Converter. Whether you’re a professional or a casual user, mastering how to convert a MOV to MP4 can simplify your digital life significantly. Join us as we explore user-friendly approaches to achieve this conversion with ease.
What is a MOV to MP4 Converter?
A MOV to MP4 converter is a tool that enables you to convert a MOV file to MP4. This conversion is essential because MOV files, primarily associated with Apple’s QuickTime framework, are not as universally compatible as MP4 files. MP4 files offer broader support across different operating systems, media players, and devices. They are preferred for their balance of video quality and file size, making them ideal for both online streaming and storage. Understanding how to convert MOV to MP4 can help you ensure your videos are playable wherever you need them.
How to Convert Large MOV to MP4 with HitPaw Video Converter
HitPaw Video Converter is a standout choice for those seeking a dependable and flexible solution for video conversions. It is perfect for users who require fast and effective conversions without compromising on video quality. Whether you’re looking to convert large MOV to MP4 or handle other format changes, HitPaw Video Converter is designed to make the process straightforward and reliable, ensuring you get the results you need with minimal effort.
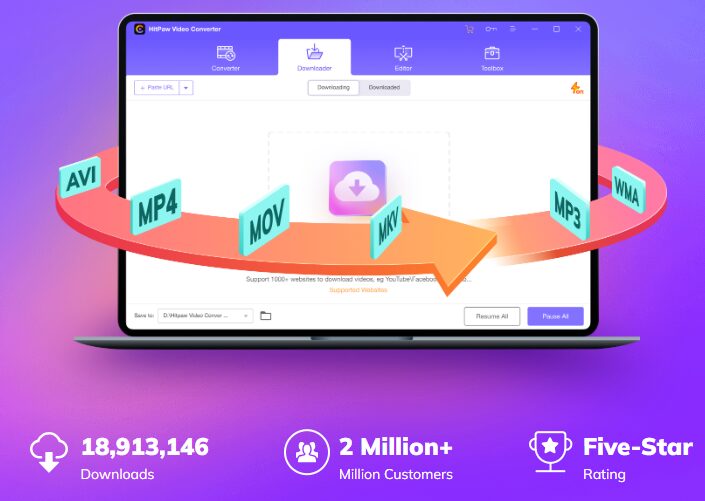
Features:
- High-Quality Conversion: Ensures lossless video quality.
- Fast Conversion Speed: Uses advanced algorithms to speed up the process.
- Wide Format Support: Converts a variety of video formats beyond just MOV and MP4.
- Customization Options: Allows customization of video resolution, bitrate, and frame rate.
- Batch Conversion: Converts multiple files at once for added efficiency.
- Intuitive Interface: Easy for both beginners and experienced users.
- Cross-Platform Compatibility: Available for Windows and macOS.
Steps to Use HitPaw Video Converter:
- Download and install program here.
- Launch the program and click on “Add Files” to import your MOV files.
- Select MP4 as the output format from the dropdown menu.
- Adjust output settings as necessary.
- Set the destination folder for the converted file.
- Click “Convert” to start the process and track progress with the status bar.
- Access the converted MP4 file in the chosen folder after completion.
How to Convert MOV to MP4 with AVS Video Converter

AVS Video Converter stands out as a robust solution for those looking to streamline their video conversion processes, including the popular task of converting MOV files to MP4. Tailored for users who require not only efficiency but also comprehensive editing capabilities, this tool offers a seamless blend of functionality and user-friendly features. Whether you need to convert a MOV file to MP4 or tweak your videos with advanced editing options, AVS Video Converter is designed to meet your needs effectively. Let’s dive into how this versatile tool can enhance your video conversion experience.
Features:
When using AVS Video Converter to convert MOV to MP4, you can take advantage of several powerful features that enhance the conversion experience:
- Customizable Output Settings: AVS Video Converter allows users to tailor the output video to their specific needs. You can modify various parameters such as resolution, bitrate, codecs, and frame rates to optimize your videos for the desired quality and file size.
- Batch Conversion Capability: For those with multiple MOV files needing conversion, AVS Video Converter supports batch processing. This feature enables you to convert several files at once, saving significant time and effort.
Steps to Convert MOV to MP4
- Select the To MP4 button at the Formats Tab.
- Upload your MOV file and set your desired output specifications.
- Apply video effects if necessary through the Edit button.
- Initiate the conversion and upon completion, access the MP4 file via the output folder.
How to Convert MOV to MP4 with VLC Media Player

VLC Media Player is renowned not only for its broad compatibility as a media player but also for its capability to convert video files, such as converting MOV to MP4. This feature-packed tool is favored for its adaptability, allowing users to easily switch video formats to ensure compatibility across various devices. Whether you’re looking to convert MOV to MP4 for easier sharing or for better playback on different platforms, VLC Media Player provides a straightforward and efficient solution.
Features
Using VLC Media Player to convert MOV to MP4 offers several advantageous features:
- Comprehensive Format Support: VLC is well-known for its ability to handle a wide array of video formats, including MOV and MP4. This feature ensures that users can not only convert between these two popular formats but also manage a variety of other media types.
- Video Adjustment Tools: While converting your MOV files to MP4, VLC allows you to tweak video and audio settings. You can adjust aspects like video codec, resolution, and bitrate, as well as audio tracks and subtitles.
Conversion Steps in VLC
- Open VLC and navigate to the Media tab, then select Convert/Save.
- Add your MOV file and proceed to Convert/Save.
- Choose “Video – H.264 + MP3 (MP4)” from the Profile options and set your destination.
- Start the conversion and retrieve your MP4 file upon completion.
How to Convert MOV to MP4 with Freeconverter
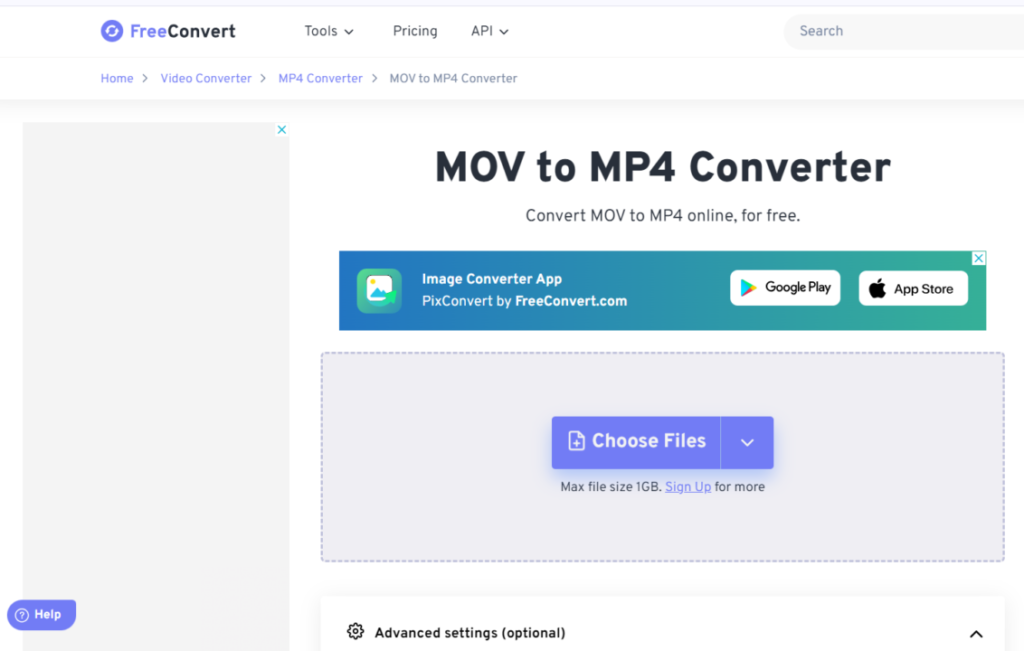
Freeconverter provides a convenient, web-based platform for those seeking to convert MOV to MP4 without the hassle of downloading and installing software. Ideal for quick conversions, this tool offers a user-friendly interface that simplifies the process, making it accessible for even novice users. Whether you’re tackling a one-time conversion or need a reliable solution for frequent video format changes, Freeconverter is designed to deliver high-quality results efficiently.
Features
When using Freeconverter to convert MOV to MP4, you can benefit from several notable features that make the process efficient and user-friendly:
- Ease of Use: Freeconverter provides a straightforward, intuitive interface that simplifies the conversion process. Users can easily upload their MOV files, initiate the conversion with a single click, and download the converted MP4 files. This simplicity is ideal for those who prefer a no-fuss, direct approach to video conversion without navigating complex settings.
- High-Quality Conversions: Despite being a web-based tool, Freeconverter does not compromise on the quality of the converted videos. It uses advanced algorithms to ensure that the output MP4 files maintain the best possible quality, closely mirroring the original MOV files.
Conversion Steps on Freeconverter
- Upload your MOV file by clicking “Choose Files.”
- Select “Convert to MP4” and start the conversion.
- Download your MP4 file once the status shows “Done.”
Related Questions for How to Convert MOV to MP4
Let’s get to some of the frequently asked questions:
Q: Can I convert MOV to MP4 without losing quality?
A: Yes, using tools like HitPaw Video Converter, you can maintain high video quality during the conversion.
Q: Is it possible to convert MOV to MP4 on mobile?
A: Yes, several mobile apps allow you to convert MOV to MP4 directly on your smartphone.
Final Verdict
In conclusion, converting MOV files to MP4 is a vital step to ensure your videos are compatible across multiple devices and platforms. Using tools like HitPaw simplifies this process while maintaining the high quality of your videos. Whether you’re a casual user looking to share videos with friends or a professional preparing media for diverse platforms, mastering the skill of converting a MOV file to MP4 is indispensable in today’s digital landscape. Embrace these tools to make your video conversion tasks seamless and efficient.
Did you find this article helpful? Check out the rest of our blogs!

The choice of the swimsuit will have a direct bearing on the ability of the woman to exude confidence in settings like the beach or pool. The selection of the swimsuit that complements and enhances the feminine curves of women is now inevitable. Today’s consumer desires swimwear that incorporates style along with structure and comfort.
When the proportions are taken into consideration while selecting the proper cuts and designing swimwear with particular elements in mind, swimwear becomes much more attractive and flattering to wear.
Where Body Shape Meets Smart Design
Natural shaping starts with understanding the relationship between various silhouette designs and the body type. Rather than imposing fads for all body shapes, swimwear is designed based on proportions and balance.
Examples of swimwear styles include modest swimwear in Canada, which shows how the right fit and flattering cover can help achieve a natural shape without going for skimpy designs.
Clean design allows the body to be showcased effectively through swimwear that flatters the body.
1. Identify Your Body Shape First
Body Type Knowledge When Choosing a Swimwear Suit. Body shapes include pear shape, apple shape, hourglass shape, athletic shape, and rectangular shape.
Based on one’s body shape, there are certain benefits to choosing specific swimsuits. For instance, detailed or patterned tops suit pear-shaped bodies well, while apple-shaped individuals may look good in suits that have ruching at the middle part of their bodies.
2. Use Strategic Design Elements
The small design details have great importance in determining the look. The ruching, paneling, and color blocking can help give definition to the body.
The ruching will help define the midriff area. The high heels can make the legs appear longer. The tops can help in balancing the top half of the body. Darker colors will make one look slimmer whereas brighter colors will bring out the particular areas.
3. Focus on Proper Fit and Support
Even the most perfect swimsuit will fail to work without proper fitting. This is because all fabrics tend to expand when exposed to water. Features such as straps that can be adjusted and bras sewn inside the suit will ensure that the swimsuit maintains its form. When the swimsuit is properly fitted, it enhances the natural body shapes while at the same time making the wearer feel comfortable.
4. Balance Proportions Through Styling
The aim of accentuating the body’s form should not focus on altering the body itself but on creating harmony visually. Proportions may be balanced using the right style choices. Full hips may be balanced using elaborate tops while wider shoulders may be balanced by plain upper styles.
High-rise bottoms can highlight your waist and improve structure. Well-proportioned clothing will give you balance.
5. Choose Fabrics That Support Shape
Fabric determines the quality of your swimwear. The fabric should be stretchable to bend with your movements but maintain its shape.
Four-way stretch materials offer flexibility without loss of shape. Compression materials offer support to help enhance natural body shapes.
Options such as modest swimsuits in Canada highlight how modern materials combine flexibility with structure to enhance both comfort and appearance. When fabric works with the design, the result is a swimsuit that maintains its form over time.
6. Highlight Features You Feel Confident About
The design of the swimsuit must consider both practicality and aesthetics. By considering one’s favorite aspects, one will achieve greater self-confidence and overall beauty.
A waist-hugging cut would work for those interested in highlighting their waists. For those whose favorite body part is their bust, adding padding or texture may work.
By selecting the right leg line, one may be able to look taller. Focusing on strong points will increase self-confidence.
7. Avoid Excess Fabric or Poor Tailoring
Excess fabric becomes problematic because it is difficult to integrate into a garment that looks good. Contemporary swimsuits have learned how to minimize bulky appearances through careful cutting and tailoring.
Good tailoring allows clean seams, even proportionality, and ease of movement. The result is a garment with a clean, sleek appearance. Bad tailoring ruins proportionality and makes a garment less comfortable.
8. Test Movement Before Final Choice
The swimsuit must work properly when you move as opposed to remaining static. Walking, stretching, and even swimming will test whether or not the swimsuit holds its form.
The straps should not fall out of place, while fabric movement should be limited. You will need consistency with your coverage without any need for readjustment.
Where Shape and Confidence Align
Selecting swimwear that flatters your figure depends on good fit and proportions. If combined properly, the resulting swimwear will be a lot more than an eye-catching garment.
Some labels concentrate on trends, for example, Seafolly; other brands prefer functionality, for instance, Speedo. This way, they meet particular demands; however, some issues may remain unresolved when it comes to proportions and stylish appearance.
LYRA Modest is one of those brands where good fit and modern styling go hand in hand. As a result, LYRA swimsuits can perfectly flatter one’s body shape without sacrificing comfort.

Telegram has become one of the most popular messaging apps for people who want fast communication, strong privacy, and easy file sharing. Many users in China and Chinese-speaking communities search for ways to install and use Telegram smoothly on their devices. Whether you use Android, iPhone, Windows, or Mac, learning the correct setup process can save time and avoid common problems.
Many users search for telegram下载 because they want a secure messaging app that supports voice calls, group chats, file sharing, and private communication. In this guide, you will learn how to install Telegram on Chinese devices, adjust language settings, and use its main features without confusion.
Why Telegram Is Popular Among Chinese Users
Telegram is known for its speed and clean interface. Unlike many messaging apps, it allows users to send large files, create channels, and join communities with thousands of members. It also works across multiple devices at the same time.
Another reason people prefer telegram中文 versions is the availability of language support and simple navigation. Chinese-speaking users can change the app language and customize settings according to their needs. The app is also lightweight, making it suitable for older smartphones and tablets.
How to Download Telegram on Android Devices
Downloading Telegram on Android is simple if you follow the right steps. First, open your browser or app marketplace and search for the latest Telegram APK or official app version.
Here are the basic steps:
Step 1: Find a Trusted Source
Always download Telegram from a trusted website or official app store. This helps avoid fake apps or security risks. Many users search for telegram下载 to find safe installation files for Android devices.
Step 2: Enable Unknown Sources
If you install an APK file manually, go to your phone settings and allow installation from unknown sources. This option is usually found in the security section.
Step 3: Install and Open the App
After downloading the file, tap install and wait a few seconds. Once installed, open Telegram and register using your phone number.
How to Use Telegram on iPhone and iPad
iPhone users can install Telegram directly from the App Store. Search for Telegram Messenger and download the latest version.
After installation, open the app and follow these steps:
- Enter your mobile number
- Verify your account with the SMS code
- Set your profile name and picture
- Start chatting with contacts or groups
Many Apple users prefer telegram中文 settings because the translated interface makes navigation easier for beginners.
Setting Telegram to Chinese Language
Some devices install Telegram in English by default. Luckily, changing the language is very easy.
Change Language Settings
- Open Telegram settings
- Tap “Language”
- Select Chinese or Simplified Chinese
- Restart the app if needed
After completing these steps, your app will display menus and options in Chinese. This improves usability for users who are more comfortable reading Chinese text.
Best Features of Telegram
Telegram offers many useful features that make it different from regular messaging apps.
Fast File Sharing
Users can send videos, documents, music files, and photos without heavy compression. This feature is useful for students, office workers, and content creators.
Large Group Support
Telegram groups can support thousands of members. Communities use these groups for discussions, updates, and online learning.
Privacy and Security
Telegram provides encrypted chats and privacy controls. Users can hide phone numbers, block unknown contacts, and use two-step verification for better account protection.
Because of these features, searches for telegram下载 continue to grow among users looking for secure communication tools.
Tips for Better Telegram Experience
Using Telegram becomes easier when you know a few important tips.
Keep the App Updated
Always install the latest version to improve performance and security. Updates often fix bugs and add new features.
Use Cloud Storage Features
Telegram stores messages and media in the cloud. This means you can access your files from multiple devices without losing data.
Organize Chats
Create folders for work, family, and personal chats. This makes the app cleaner and easier to manage.
Protect Your Account
Enable two-factor authentication and use a strong password. This helps keep your conversations secure.
Common Problems and Solutions
Some users may face installation or login issues on Chinese devices.
App Not Installing
Check your storage space and internet connection. Also, make sure the APK file is fully downloaded.
Verification Code Not Received
Wait a few minutes and try again. Sometimes network delays can slow SMS delivery.
Language Not Changing
Restart the app after selecting Chinese language settings. In most cases, this solves the problem immediately.
Users searching for telegram中文 guides often face these small setup issues during installation.
Conclusion
Telegram is a powerful messaging platform for users who want speed, privacy, and easy communication across devices. Installing the app on Chinese Android phones, iPhones, or desktop computers is simple when you follow the correct steps.
Whether you search for telegram下载 to install the app or want to use telegram中文 settings for a better experience, Telegram offers flexible features that work well for personal and professional communication. By keeping the app updated and using its security features properly, users can enjoy safe and smooth messaging every day.

Why Underground Fuel Tanks Eventually Need Removal
Across industrial and commercial properties, underground fuel tanks have served as reliable storage systems for decades. But as tanks age, they begin to corrode, weaken, and pose environmental risks that can no longer be ignored. That is why gas tank removal underground becomes an essential part of responsible facility management. These tanks operate out of sight, but their condition directly impacts safety, compliance, and long-term operational stability.
Underground tanks deteriorate in ways that are difficult to detect without professional inspection. Soil moisture, shifting ground, and constant exposure to fuel can create structural weaknesses that compromise the tank’s integrity. Even a small leak underground can spread contaminants far beyond the property line. Removing old tanks before these failures occur protects both the business and the environment.
How Underground Tanks Begin to Deteriorate
Unlike above-ground systems, underground tanks face constant pressure from surrounding soil. Moisture sits against the tank walls for years, gradually breaking down protective coatings. Fuel often contains additives and sediments that accelerate internal corrosion. Temperature changes expand and contract the steel, weakening welds and seams. Over time, these factors contribute to the need for gas tank removal underground before the tank reaches a critical point.
Many tanks installed 20 to 40 years ago were not designed to meet today’s environmental standards. Their materials and coatings eventually reach the end of their lifespan, making removal the safest and most responsible option.
Why Professional Removal Is Non-Negotiable
Removing an underground fuel tank is a highly regulated process. It requires specialized equipment, environmental expertise, and strict safety procedures. Even empty tanks can contain vapors that pose fire or explosion risks. Professionals manage this work using controlled methods that prevent accidents and protect the surrounding property.
A professional team begins by locating the tank precisely, exposing it through careful excavation, and removing any remaining product or vapors. Once the tank is safe to handle, it is lifted from the ground and prepared for disposal. Every step must be executed with precision to ensure compliance with environmental and safety regulations.
How the Removal Process Is Carried Out Safely
The process of gas tank removal underground follows a sequence designed to control risk and maintain stability. The area above the tank is excavated gradually to avoid damaging nearby utilities or structures. Once the tank is uncovered, specialists clean the interior to eliminate residual fuel and vapors. Only after this cleaning is complete can the tank be safely cut, lifted, or transported.
The team also inspects the surrounding soil for any signs of contamination. If contamination is discovered, additional cleanup steps must be taken to restore the site. These environmental safeguards ensure the property remains safe for future use and meets all regulatory expectations.
Why Environmental Testing Is a Central Part of Removal
Soil and groundwater testing confirm whether the tank leaked during its lifetime. This testing is not optional; it is required by environmental agencies to protect surrounding land and water sources. The results determine whether remediation is needed before the site can be cleared.
Testing provides critical information, such as the presence of petroleum residues, the depth of contamination, and whether nearby structures or land features may be affected. This data becomes part of the documented record that proves gas tank removal underground was completed responsibly and in accordance with regulations.
How Removal Supports Regulatory Compliance
Industries that use underground fuel tanks must comply with strict standards set by environmental authorities. Failing to remove a failing or outdated tank can result in fines, operational restrictions, or long-term liability. Removal demonstrates that the facility is taking preventive action to protect the environment and maintain safe operations.
Compliance is not just about avoiding penalties. It’s about safeguarding the long-term viability of the property. A well-executed removal shows regulators, auditors, and stakeholders that the business manages environmental responsibilities with care.
The Challenges of Working Beneath the Surface
Underground tank removal demands expertise because the work occurs in a concealed and unpredictable environment. Soil types vary widely, and conditions underground can change quickly during excavation. Tanks may be located near building foundations, active utilities, or paved surfaces that limit access. Professionals plan each removal carefully to avoid damaging surrounding structures.
Weather also plays a role. Heavy rain, heat, or freezing temperatures influence soil stability and require adjustments on the job. Despite these challenges, skilled removal teams complete the process with minimal disruption to facility operations.
Why Early Removal Protects Property Value
Allowing an old underground tank to remain in place can create risks that undermine the property’s long-term value. Even inactive or empty tanks can contain residue that contaminates soil over time. Many buyers, insurers, and lenders require proof that outdated tanks have been removed properly before approving transactions or underwriting coverage.
Early gas tank removal underground prevents these complications. It creates a clear record of responsible environmental management and allows the property to be used, sold, or redeveloped without concerns about hidden risks beneath the surface.
The Long-Term Benefits of Safe Tank Removal
Removing underground tanks strengthens the facility’s environmental profile, reduces long-term liability, and ensures the site meets modern regulatory expectations. It also opens the door for updated storage systems that provide easier maintenance, better monitoring, and improved safety features.
When a tank is removed responsibly, facilities gain confidence in the integrity of their property and reduce the risks associated with aging underground structures. Through proactive planning and expert execution, gas tank removal underground becomes a smart investment in the safety and future of the entire operation.
-

 Education2 years ago
Mastering Excel: Your Comprehensive Guide To Spreadsheets And Data Analysis
-

 Tech2 years ago
How To Choose The Best Forex Trading Broker?
-

 Business2 years ago
Exploring the Rental Market: Properties for Rent in Malta
-

 Blog2 years ago
Arab MMA Fighters Shine Bright: Meet the Champions of PFL MENA
-

 Tech2 years ago
The Role Of Experts VS Top Mobile Apps for Green Screen Removal
-

 Travel2 years ago
Experience the Best Desert Safari Dubai Offers!
-

 Home Improvement2 years ago
Eco-Friendly Round Rug Options for Sustainable Living in NZ
-

 How-To Guides2 years ago
Comprehensive Guide to Cockwarming: Enhancing Intimacy and Connection