
Home Improvement
The Top Trends in Textured Deck Paint for a Modern and Functional Outdoor Space

Are you looking to breathe new life into your outdoor space? Textured deck paint is paving the way for modern and functional outdoor areas that blend style with practicality.
This blog post dives into the top trends in textured deck paint, offering valuable insights for homeowners eager to revamp their decks. From innovative finishes to eco-friendly options, you’ll discover how these trends can transform your deck into a space that’s both stunning and durable.
Eco-Friendly Paints
In today’s environmentally conscious world, eco-friendly textured deck paints are making waves. These paints are designed to minimize harmful emissions and often feature natural ingredients.
Low VOCs
Volatile Organic Compounds (VOCs) are chemicals that can be harmful to both your health and the environment. Eco-friendly paints typically have low or zero VOCs, making them a safer option.
Durability
Despite their eco-friendly nature, these paints do not compromise on durability. They provide long-lasting protection for your deck.
Slip-Resistant Finishes
Safety is paramount, especially in areas prone to water and moisture. Slip-resistant textured finish deck paints are gaining popularity for their ability to provide a secure footing.
Versatility
These finishes are available in various colors and styles, ensuring you don’t have to sacrifice aesthetics for safety. You can choose from a range of textures, including fine and coarse options.
Easy Application
Many of these paints are easy to apply, requiring just a single coat for effective slip resistance. This makes them an ideal choice for DIY projects.
Metallic Accents
For those looking to make a bold statement, metallic textured deck paints are a perfect choice. These paints add a touch of glamour and sophistication to any outdoor space.
Reflective Qualities
Metallic paints reflect light, adding a unique shimmer that changes with the angle of the sun. This can create a stunning visual effect on your deck.
Variety of Shades
From gold to silver to bronze, there are numerous shades to choose from, allowing for customization. You can also combine different shades to create a one-of-a-kind look.
UV-Resistant Paints
UV-resistant textured deck paints are essential for maintaining the color and integrity of your deck over time. These paints are formulated to resist the damaging effects of UV rays.
Color Retention
UV-resistant paints maintain their color longer, preventing the fading that often occurs with sun exposure. This ensures your deck looks vibrant and new for years to come.
Aesthetic Appeal
These paints ensure your deck remains a focal point of your outdoor space. You can choose from warm earthy tones to vibrant hues, based on your preference.
Quick-Dry Formulas
For those with busy lifestyles, quick-dry textured deck paints are a game-changer. These paints allow you to complete your painting project in a fraction of the time.
Fast Application
Quick-dry formulas reduce the waiting time between coats, enabling you to finish your project faster. This is especially helpful for those with limited time or unpredictable weather conditions.
Revamping your deck with textured deck paint is just the beginning. Proper exterior painting tips are crucial for achieving a flawless and long-lasting finish.
Weather Resistance
These paints are designed to withstand changing weather conditions, providing long-lasting protection. This makes them a great choice for outdoor design spaces that are exposed to the elements.
Exploring the Trends in Textured Deck Paint
Textured deck paint trends are transforming outdoor spaces, offering a perfect blend of style and functionality. By staying informed about these trends, you can create a deck that not only enhances your home’s aesthetic but also provides a safe and enjoyable environment.
For more helpful tips, check out the rest of our site today!
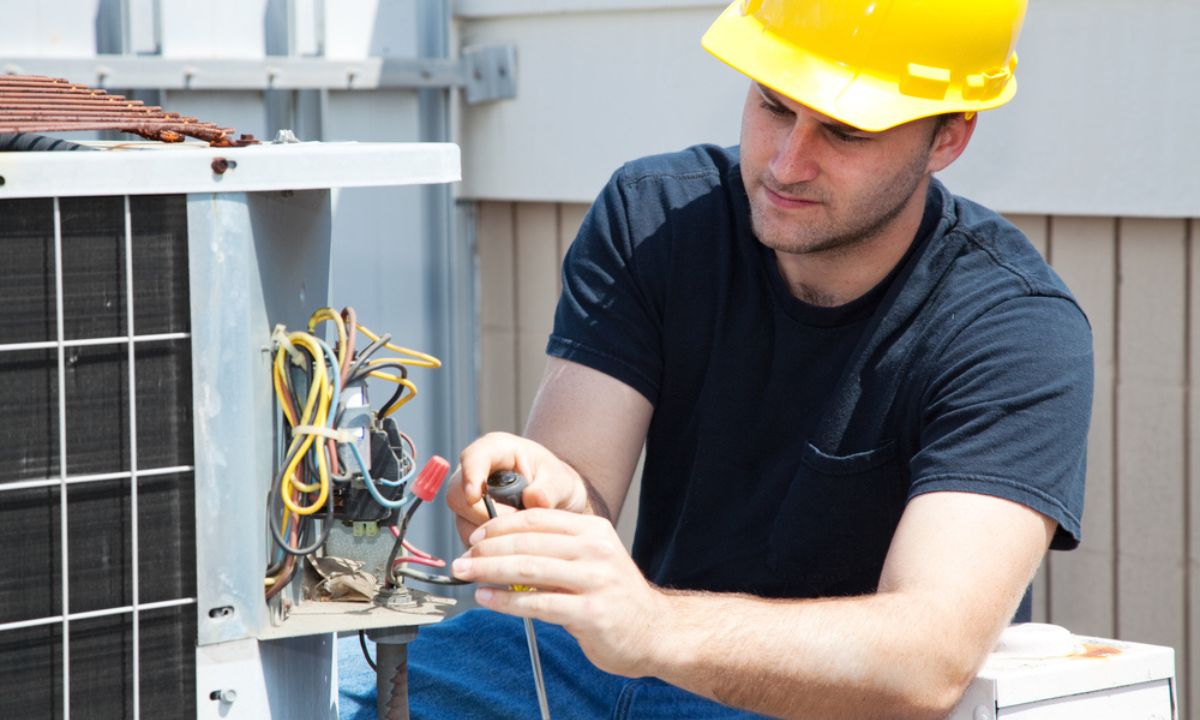
With rising energy prices, homeowners in Stratford, CT, are constantly looking for ways to enhance home comfort without inflating their utility bills. One solution that stands out is upgrading to energy efficient HVAC systems in Stratford, CT. Not only do these systems reduce energy consumption, but they also improve indoor air quality and overall home comfort.
As many are becoming aware, traditional heating and cooling systems can consume a significant amount of energy. In this article, we’ll explore how switching to energy efficient HVAC systems in Stratford, CT can lead to substantial savings while benefiting both the environment and your home’s comfort.
Why Choose Energy-Efficient HVAC Systems?
Energy-efficient HVAC systems are designed to use less energy while providing the same level of comfort. This makes them an attractive option for homeowners looking to save on utility bills.
Benefits of Energy-Efficient HVAC Systems
- Lower Utility Bills: These systems consume less energy, leading to lower monthly bills.
- Improved Comfort: With better temperature regulation and air distribution, energy-efficient HVAC systems enhance comfort levels year-round.
- Environmentally Friendly: Reduced energy usage means a smaller carbon footprint, making these systems an eco-friendly choice for homeowners who want to reduce their environmental impact.
- Increased Property Value: Homes with energy-efficient systems often see an increase in value due to their cost-saving potential and environmental appeal.
Key Features of Energy-Efficient HVAC Systems
Energy-efficient HVAC systems incorporate advanced technology that helps reduce their energy consumption. Some of the most notable features include:
- Smart Thermostats: These thermostats can be programmed to adjust the temperature according to your schedule, ensuring that energy isn’t wasted when you’re not home.
- Variable-Speed Motors: Unlike traditional HVAC systems, these motors adjust to the demand for heating or cooling, providing optimal efficiency without overworking the system.
- Zoning Systems: By dividing your home into zones, you can control the temperature in different areas, which can prevent unnecessary heating or cooling in unused spaces.
- High-Efficiency Filters: Energy-efficient HVAC systems often include better air filters that not only improve air quality but also contribute to system efficiency.
The Environmental Impact of Energy-Efficient HVAC
Switching to energy-efficient HVAC systems doesn’t just help save money—it can also reduce your carbon footprint. By using less energy, these systems reduce the need for fossil fuels, which in turn minimizes air pollution.
As an added benefit, many energy-efficient models use refrigerants that are less harmful to the ozone layer, contributing to a more sustainable future.
Common HVAC Problems and How Energy-Efficient Systems Solve Them
Traditional HVAC systems often experience problems that contribute to higher energy usage, including poor air quality, frequent breakdowns, and inefficiency.
Energy-efficient HVAC systems can help solve these problems in the following ways:
- Improved Air Quality: Energy-efficient systems often come with upgraded filters that capture dust, pollen, and other allergens.
- Fewer Breakdowns: The advanced technology in energy-efficient models makes them more reliable and less likely to break down compared to older systems.
- Better Temperature Control: These systems provide more consistent temperatures throughout your home, ensuring that every room stays comfortable.
Finding the Right HVAC System for Your Stratford Home
Choosing the best energy-efficient HVAC system for your home requires understanding your needs. Homeowners should consider:
- Home Size: Larger homes may require more powerful units, while smaller homes could benefit from a more compact system.
- Climate Considerations: Stratford experiences cold winters and warm summers, so a system that efficiently handles both heating and cooling is essential.
- Budget: While energy-efficient systems can be more expensive upfront, they save money over time through reduced energy bills.
The Cost Savings Over Time
Although energy-efficient HVAC systems may require a higher initial investment, the long-term savings can make them well worth it. Homeowners can expect:
- Lower Energy Bills: These systems use up to 50% less energy than traditional systems.
- Less Frequent Repairs: With their advanced technology, these systems require fewer repairs, which reduces overall maintenance costs.
- Tax Incentives and Rebates: Many utility companies and government programs offer rebates or tax credits for installing energy-efficient systems, further reducing the cost.
Conclusion
Investing in energy-efficient HVAC systems in Stratford, CT is a smart choice for homeowners looking to improve their comfort and save on utility bills. These systems not only reduce energy consumption and costs but also contribute to a healthier environment.
If you’re ready to make the switch, consult with an HVAC professional to find the best energy-efficient HVAC system for your home. Enjoy the long-term benefits of reduced bills and improved comfort by choosing a more sustainable solution for your heating and cooling needs.
READ ALSO: Troubleshooting Common Issues with HVAC Drainage
The floors that we walk on every day play a crucial role in our homes. Whether it’s the warm touch of a richly stained wood parquet or the sleek allure of a polished hardwood floor, quality flooring can transform a space. This is where the artisans from Hartung Parketthandwerk step in. With their expertise in the delicate craft of parquetry and the steadfast dedication to superior service, they stand out as one of Berlin and Brandenburg’s premier flooring specialists. Delve into this blog to discover why Hartung Parketthandwerk is the go-to choice for homeowners, designers, and flooring businesses in the region.
Overview of Hartung Parketthandwerk
Hartung Parketthandwerk is a family-owned business that has been setting the standard for exceptional flooring services in the Berlin and Brandenburg area for over two decades. What distinguishes them is their relentless pursuit of excellence and a deep-rooted passion for the craft. Whether it’s the installation of intricate parquet designs that require a delicate touch, or the restoration of historical floorings needing careful attention to detail, the team at Hartung Parketthandwerk approaches each task with precision and dedication.
Services Offered
Parquet Installation
Setting parquet is like creating an art piece that you can walk on. Hartung Parketthandwerk’s parquet installations are renowned for their meticulous attention to pattern and placement. From classic herringbone designs to contemporary geometric layouts, they bring visions to life with expertise and excellence. Each piece is carefully selected for quality, fit, and finish, ensuring the final installation is a masterpiece.
Floor Restoration
Preserving the past through the restoration of hardwood floors is a unique and vital service that Hartung Parketthandwerk provides. They understand the historical significance and emotional value that old floors can hold. Their restoration process rejuvenates the wood, returning it to its original timeless beauty while maintaining the integrity of the design.
Custom Flooring Solutions
For clients with a specific aesthetic in mind, Hartung Parketthandwerk offers custom flooring solutions. This level of customization means that whether the client is looking for a particular wood species, a unique finish, or a specialized pattern, Hartung Parketthandwerk can craft a bespoke solution that aligns perfectly with the client’s vision.
Expertise and Craftsmanship
Experience in the Industry
With over two decades of experience in parquet and flooring, Hartung Parketthandwerk boasts a wealth of knowledge that is hard to match. The team continuously updates their skills and knowledge to stay at the forefront of industry trends, materials, and techniques, ensuring that they deliver the highest quality work.
Quality Workmanship
Hartung Parketthandwerk’s craftspeople are dedicated to the art of laying floors. Their reputation for quality workmanship is renowned, with every flooring project being a testament to their skill and precision. Each member of the team is a master at their craft, and it shows in the finished product.
Client Testimonials
Positive Experiences Shared
Hartung Parketthandwerk’s excellence is not just known to them; it’s heard from their satisfied customers. Clients have shared stories of how the team transformed their living spaces, exceeded their expectations, and left a lasting impression with their work.
Customer Satisfaction
The focus on customer satisfaction is evident in the business’s rapport with clients. From the first consultation to the final walkthrough, the team ensures that clients are not just happy with the product but delighted with the entire service experience.
Projects Showcase
Before and After Photos
A picture is worth a thousand words, and in the case of Hartung Parketthandwerk, their before-and-after projects speak volumes. They show the transformation of ordinary rooms into extraordinary living spaces through just the right touch of wood flooring.
Highlighting Unique Projects
Whether it’s a historic building that required precise floor restoration or a modern space that demanded a creative parquet design, Hartung Parketthandwerk has the portfolio to prove their versatility. Their unique projects standout as testaments to their creativity and adaptive abilities.
Conclusion
When it comes to flooring, especially parquet, Hartung Parketthandwerk serves as a beacon of quality and expertise. Their services range from the traditional installation to the intricate art of floor restoration and bespoke design, making them a one-stop-shop for all flooring needs. Their ethos of personalized service, dedication to craftsmanship, and commitment to client satisfaction make them the provider of choice in the Berlin and Brandenburg area.
For those in search of not just a floor but an experience that embodies artistry, craftsmanship, and excellence, Hartung Parketthandwerk stands ready to turn your vision into reality.
Call to Action
If you are an individual, a designer, or a business in the Berlin and Brandenburg region in search of unparalleled flooring services, don’t hesitate to reach out to Hartung Parketthandwerk. Their commitment to excellence will ensure that your next flooring project is a work of art.

Embarking on a home renovation project can be an exhilarating yet daunting process, with many homeowners overlooking the inevitable accumulation of debris and unwanted materials. Efficient junk removal is a crucial component of a successful renovation, ensuring your work area is safe and clutter-free. Whether tearing down walls or updating fixtures, the waste generated can quickly become overwhelming. Professional junk removal companies provide the necessary means to keep your renovation organized and on track. Below, we explore the benefits of enlisting expert services for your home cleanout tasks.
Ensuring Safety and Compliance with Professional Junk Removal
Renovation projects can create hazardous environments if waste is not managed properly. Sharp debris, heavy materials, and potentially dangerous substances all pose serious safety risks. Hiring professionals for junk removal ensures these threats are handled correctly, reducing the chance of accidents or injuries.
Beyond safety, proper disposal is essential to stay compliant with local laws. Companies offering junk removal in Fort Collins, CO, are familiar with state and municipal regulations, use the right equipment and techniques to remove waste responsibly. Their services reflect a strong commitment to both safety and environmental care.
The Importance of Efficient Debris and Junk Removal During Home Renovations
Home renovations often produce large amounts of waste, including construction debris, old appliances, and personal items. If not properly managed, this clutter can hinder workflow, delay progress, and create safety hazards for contractors. Maintaining a clean and organized site is key to keeping renovations efficient and on schedule.
Professional junk removal services play a vital role by regularly clearing debris, allowing work to continue without interruption. These services also sort materials for recycling or donation, minimizing environmental impact. For homeowners, handling debris alone can be overwhelming and time-consuming, making professional help a practical choice that eases the burden and supports a smoother renovation process.
Streamlining Your Renovation Project with Professional Junk Hauling Services
Integrating professional junk hauling services into a renovation plan helps streamline operations by allowing construction teams to concentrate on building tasks without the distraction of waste removal. These services bring the necessary equipment and expertise to handle heavy or awkward debris efficiently, reducing strain on renovation crews.
A structured disposal approach also aids in cost control, as many companies provide upfront pricing based on volume or material type, helping homeowners avoid unexpected expenses. Junk removal teams ensure safe, efficient handling of discarded materials, maintaining workflow and project timelines. Their involvement supports a cleaner, safer site and allows homeowners to focus on design choices rather than logistics.
Enhancing Your Home’s Aesthetics and Value through Expert Cleanout Solutions
A clean, well-maintained renovation site significantly enhances both the visual appeal and efficiency of a project. Clutter and debris not only disrupt progress but also diminish the workspace’s appearance. Professional junk removal services help maintain order by promptly clearing waste, highlighting the renovation’s progress.
The property’s exterior also benefits, as a tidy environment boosts curb appeal and suggests careful project management, positively influencing perceived value. Removing old or unused items creates more functional space, making it easier to plan and implement design changes. This organized approach also supports long-term upkeep by encouraging homeowners to maintain a clean and well-managed space beyond the renovation phase.
Choosing the Right Junk Removal Company for Your Renovation Needs
Choosing the right junk removal service during a renovation requires careful consideration. Research a company’s experience, customer feedback, and whether they specialize in construction debris, as this can lead to better service tailored to renovation needs. Look for providers with clear pricing and free on-site estimates to avoid unexpected charges.
Evaluate their environmental practices; companies that focus on recycling and donation over dumping contribute positively to sustainability. It’s also important to assess their availability and flexibility, since renovation schedules often change. A provider that can adapt and offer prompt service helps keep the project on track without unnecessary delays.
Altogether, hiring a professional junk removal service for your home renovation project delivers numerous advantages, ranging from enhanced safety and efficiency to compliance and aesthetics. By selecting the right service provider, homeowners can streamline their renovation process and achieve a clutter-free, valuable outcome for their property.
READ ALSO: Save Time and Stress: The Advantage of Professional Junk Removal
-

 Education1 year ago
Mastering Excel: Your Comprehensive Guide To Spreadsheets And Data Analysis
-

 Tech2 years ago
How To Choose The Best Forex Trading Broker?
-

 Business2 years ago
Exploring the Rental Market: Properties for Rent in Malta
-

 Blog1 year ago
Arab MMA Fighters Shine Bright: Meet the Champions of PFL MENA
-

 Travel2 years ago
Experience the Best Desert Safari Dubai Offers!
-

 Home Improvement2 years ago
Eco-Friendly Round Rug Options for Sustainable Living in NZ
-

 How-To Guides2 years ago
Comprehensive Guide to Cockwarming: Enhancing Intimacy and Connection
-

 Fashion2 years ago
Black Magic: The Elegance and Sophistication of Ultimate Homecoming Dresses in Black